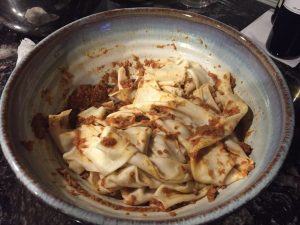
About this dish
- Serves: recipe scales
- Time: 30 minutes
- Method: counter prep
This is a basic pasta recipe. Nothing magic, but the core of a few other recipes on this site, so I included it.
Ingredients
Ingredients are given as a ratio; measure by how many eggs you make. We usually make 6 eggs at a time. A good metric is “an egg per person and two for the pot”, i.e., it’s sort of like making tea, but not 😉
- 1 C flour (we used Gold Medal all-purpose white flour, nothing fancy)
- 1 egg (usually a large one)
- 1 T water (cool, i.e., cool tap water is fine)
Equipment
- mixer with a dough hook (can be done by hand on a countertop)
- You can make this on a tabletop, e.g., a butcherblock counter, formica, etc. Our family had a large round pasta board (hardwood, around 4 feet in diameter), but it’s a LOT of work and cleanup that way.
- I made it in a KitchenAid mixer with a dough hook, much to the horror of my Nonni (Italian for grandma, i.e., nonna, but diminutive in our family), my mother’s mother.
- pasta roller (an be done on the countertop with a rolling pin)
Instructions
Add all ingredients to the mixer; no more than 6 eggs for the usual bowl size
Mix on slow until incorporated; it’ll ball up around the hook AND clean the bowl sides if you do it right. if not, add more water or flour as needed (NOT MUCH!)
Here’s the *secret* step:
WAIT at least 15 minutes before proceeding
If you don’t, it’ll be like working a rubber band. If you do, the gluten will develop and it’ll be nice and smooth.
At this point you can: – roll it and cut it into spaghetti or fettucini KitchenAid makes rollers/cutters for this purpose, or you can get a hand-crank version for the counter. Nonni used to roll it by hand, but I never got the hang of that, and prefer to use electrical appliances anyway. the trick with the rollers is not to go too thin too fast; cut a slice off the doughball, pat it with flour, and pinch it to around 1/4″ flat – only THEN should you put it through the roller, at its most open setting. then run it through again, but adjust the thickness knob down 2 notches at a time. for spaghetti, stop at the next-to-last notch or one before that then run it through the thin cutters for linguini, stop at the last or next-to-last notch – a little thinner than spaghetti – then run it through the wide cutters (1/4″) you can also cut them with a knife – flour the rolled pasta sheet and fold it over a few times, then slice with a dry knife dipped in flour you can go fairly heavy with flour dusting, esp. when the dough is cut. I tend to toss it out in some loose flour to coat the cut edges, and lay it in gentle mounds about the size of a cupped palm on a floured baking sheet; freeze the result, then pop the mounds off and put into a plastic baggie in the freezer.
FREEZES VERY WELL – over a year. It’s hard to freezer-burn it; that just dries out the pasta. you can dry it out on the counter too, but be careful; if the air is moist, this will end up making balls of goo. I still keep dried pasta in the freezer, though. I don’t know how the egg part keeps if just dried in the cupboard. – use it for filled pasta, such as ravioli or capelletti roll it fairly thin, but NOT to the thinnest setting; if you do, the pasta will tear when you fill it
NOTE – filled pasta should have the dough a little sticky, so go easy on the flour dusting. make sure the dough doesn’t stick to the rollers, but go LIGHT otherwise. if it isn’t a little damp to the touch, the surfaces won’t stick and seal the filling in!

